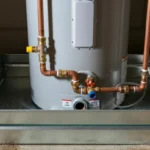
Rinnai Error Code 11 Fix
The Diagnosis: Rinnai Error Code 11 – Ignition Failure
Rinnai Error Code 11 is a critical ignition failure alert on your tankless water heater. The unit has attempted to ignite three times without success, triggering a safety lockout. This code points directly to an issue within the ignition sequence, primarily involving the gas supply, the igniter assembly, or the gas valve. Immediate diagnosis is required to restore hot water and prevent potential safety hazards.
Technical Deep Dive: Step-by-Step Diagnosis & Resolution
Follow this systematic procedure to diagnose and resolve Error 11. Always begin with the simplest, most common causes before proceeding to complex component testing. Safety Warning: Before beginning any work, shut off the electrical power to the unit at the circuit breaker and turn off the manual gas shut-off valve. Verify power is off with a non-contact voltage tester.
Step 1: Verify Basic Utilities & Reset
- Check Gas Supply: Ensure the manual gas shut-off valve is fully open. Verify other gas appliances are operating to confirm supply to the property.
- Check Water Flow: Error 11 can appear if a hot water tap is not opened fully enough to meet the unit’s minimum flow rate (typically 0.5 GPM). Open a faucet fully to confirm.
- Perform a Hard Reset: Turn off power at the breaker for 60 seconds, then restore power. This clears the lockout. Attempt to run the unit. If Error 11 returns immediately, proceed with diagnostics.
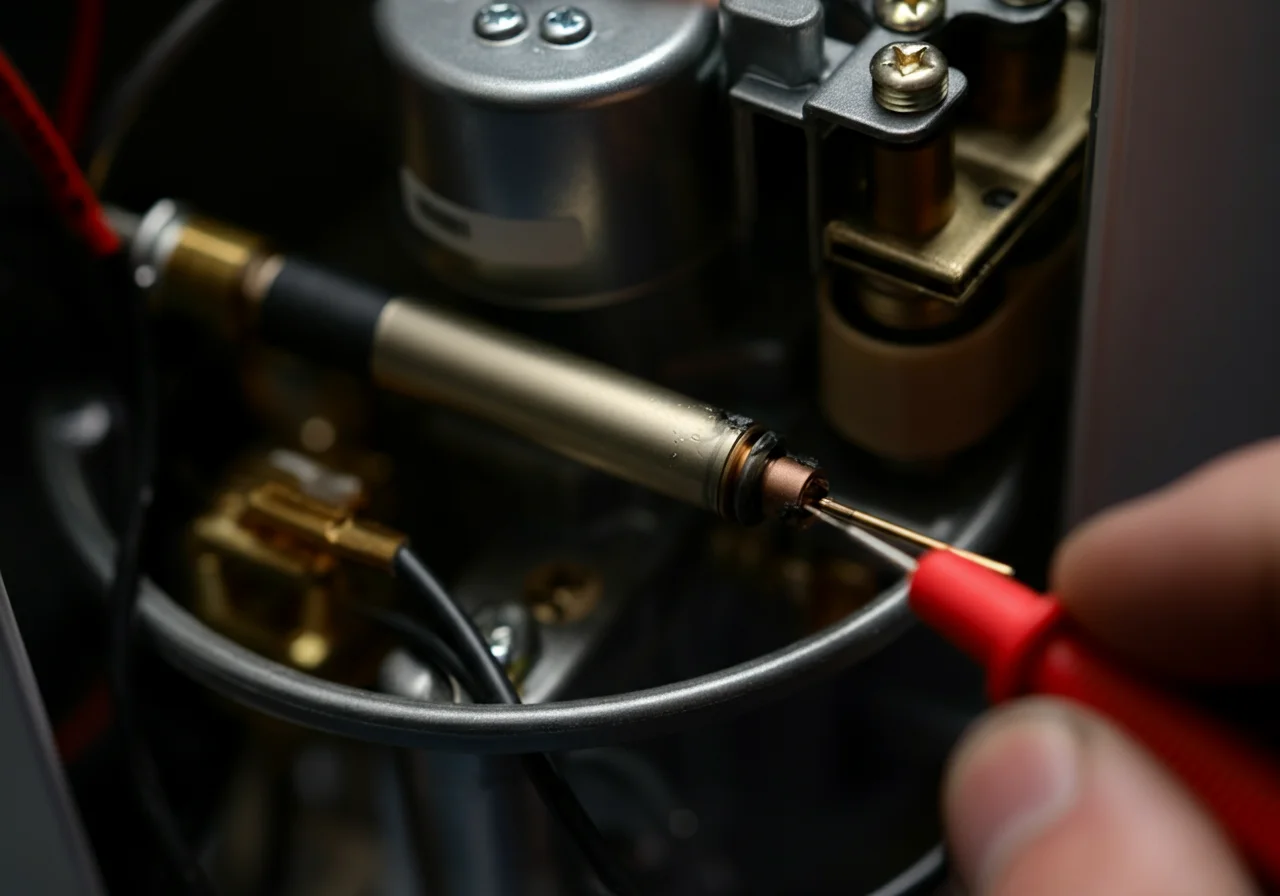
Step 2: Inspect the Ignition Assembly
The igniter (spark electrode) and flame rod (flame sensing electrode) are critical. Corrosion or misalignment prevents ignition or flame detection.
- Access: Remove the front service panel following your model’s manual.
- Visual Inspection: Locate the igniter and flame rod (two ceramic-insulated metal rods near the burner). Look for:
- White corrosion or carbon buildup on the metal tips.
- Cracked or damaged ceramic insulation.
- Proper gap (approx. 1/8 inch) between the rods and each other/burner.
- Cleaning: Use fine-grit sandpaper (120-grit) to gently polish the metal tips. Do not adjust the gap unless specified in the manual. Use a Fluke multimeter set to Ohms (Ω) to check for continuity in the igniter wire; it should read low resistance (near 0Ω). Infinite resistance indicates a broken circuit.
Step 3: Evaluate Gas Pressure & Valve Operation
Insufficient gas pressure or a faulty gas valve will cause Error 11. This requires a manometer and should be performed by a qualified technician if you are not certified.
- Tool Required: A digital manometer (e.g., Fieldpiece or UEi).
- Test Inlet Pressure: With the unit off and gas on, static inlet pressure should be within the range specified on the unit’s rating plate (typically 4-10.5″ WC for natural gas, 8-14″ WC for LP).
- Test Manifold Pressure: With the unit calling for heat, the manifold pressure must match the factory setting listed in the manual (e.g., 3.5″ WC for natural gas). A significant deviation indicates a regulator or gas valve failure.
- Gas Valve Failure: If inlet pressure is correct but manifold pressure is zero or incorrect, and the valve receives the correct 24V signal from the board, the internal gas valve solenoid is likely faulty and requires replacement.
Step 4: Assess for Scale-Related Overheating
While Tankless Descaling Flush is typically associated with error codes 10, 12, or 14 (overheating), severe scaling can indirectly cause ignition issues by disrupting water flow sensors or causing pre-ignition lockouts. If your unit is in a hard water area and has never been flushed, include this in your maintenance.
- Flush Procedure: Isolate the unit with service valves, connect a submersible pump (e.g., Milwaukee transfer pump) and bucket with a descaling solution (white vinegar or certified descale). Circulate for 45-90 minutes as per manufacturer instructions.
- Post-Flush Check: After a thorough rinse, restore the unit. A clean heat exchanger ensures proper flow and can eliminate secondary causes of ignition failure.
Code & Compliance
All gas work must adhere to strict codes for safety and insurance validity.
- International Fuel Gas Code (IFGC) Section 406: Requires gas piping systems to be tested and proved leak-free before placing an appliance in operation.
- National Fuel Gas Code (NFPA 54): Governs the installation of gas piping and appliances. Only qualified individuals should perform gas pressure tests and valve replacements.
- Manufacturer’s Instructions: Per all model plumbing codes (IPC/UPC), installation and service must follow the manufacturer’s listed instructions to maintain warranty and safe operation.
Toolbox
| Tool | Purpose | Example Brand |
|---|---|---|
| Digital Multimeter | Checking continuity, voltage, and millivolt signals. | Fluke |
| Manometer | Precise measurement of gas inlet and manifold pressure. | Fieldpiece, UEi |
| Non-Contact Voltage Tester | Verifying power is safely off before service. | Klein Tools |
| Descaling Pump Kit | Performing mandatory tankless water heater maintenance flushes. | Milwaukee, Ridgid |
External Reference
For the official technical perspective on gas ignition systems and safety, review the National Fire Protection Association’s overview of the NFPA 54 National Fuel Gas Code. This is the foundational standard referenced by most local jurisdictions.
Final Verification
After addressing the identified fault (e.g., cleaning igniter, replacing gas valve), restore gas and power. Run the unit through several heating cycles, monitoring for consistent ignition and the absence of error codes. Document all test pressures and parts replaced for future service records. If the problem persists after these steps, the issue may lie with the control board, requiring professional diagnosis.